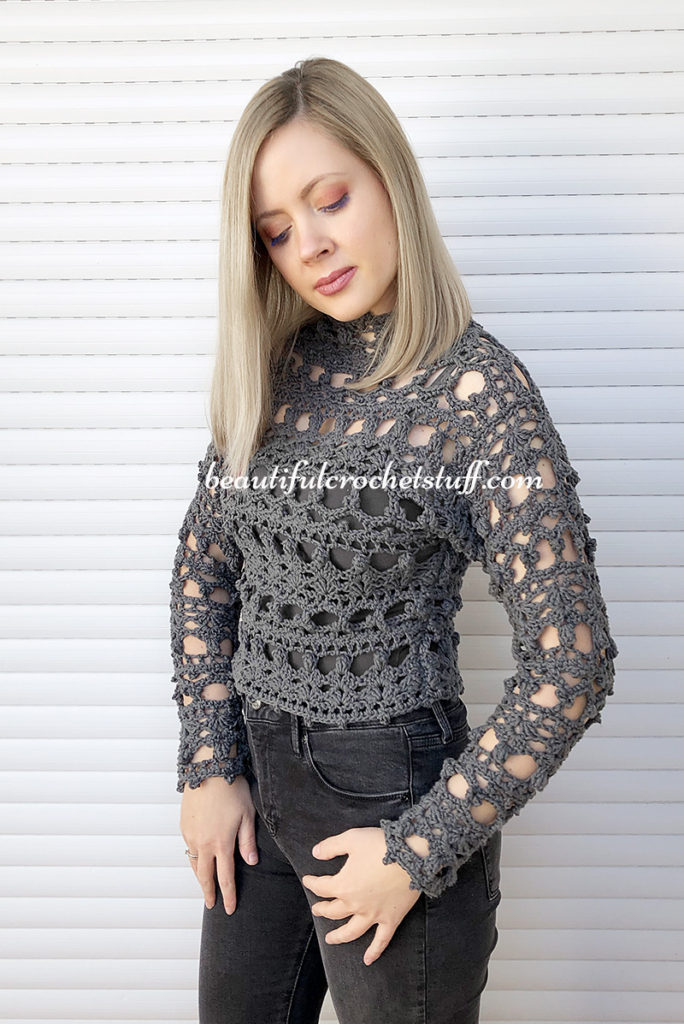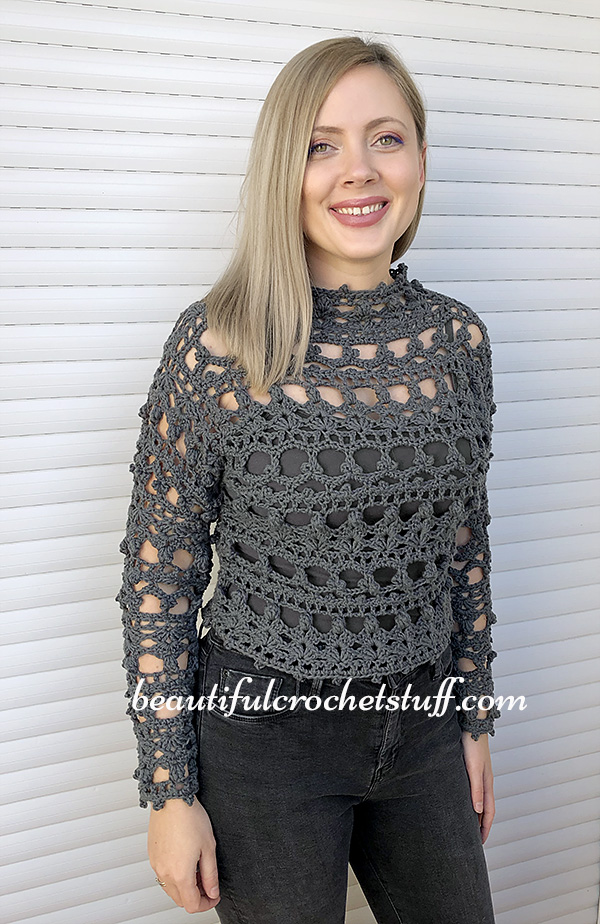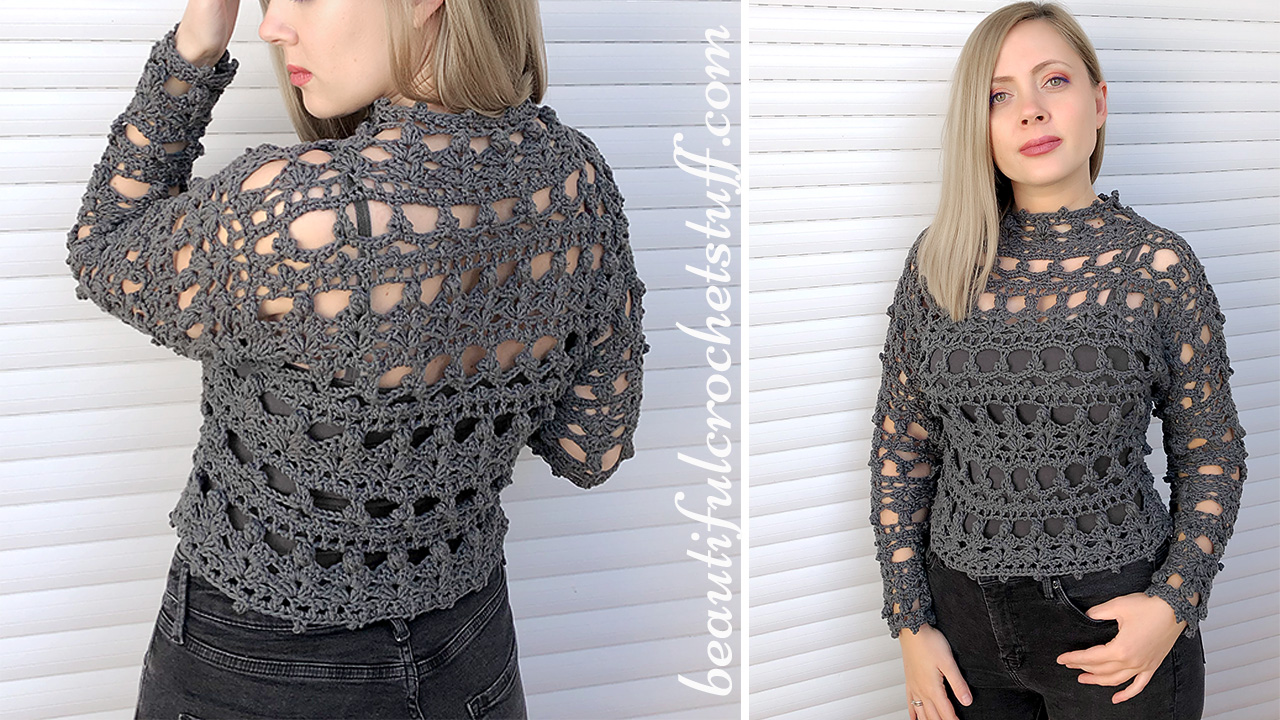
Hi girls! I have so many crochet top patterns and I thought of naming my future tops, because such names as crop, summer, lace, heart tops, etc were used many times. Today, I would like to share with you my new crochet crop top “SUSAN”. I don’t know why exactly this name but I think Susan suits it well. If your name is Susan leave a comment below! Let’s check how many Susans we have here :)
PLEASE DON’T FORGET TO SUBSCRIBE TO MY CHANNEL: CLICK HERE
AND FOLLOW MY INSTAGRAM: CLICK HERE
YOU CAN DOWNLOAD A PDF INSTRUCTIONS HERE
MATERIALS:
Yarn 8 skeins: DROPS Loves You 8
Weight: Aran
Yardage: 93 yards(85 meters)
Unit weight: 50 grams (1.76 ounces)
Hook size: 5.0 mm (G)
Fibers: 100% Cotton
Texture: plied
Size: S-M, length – 45 cm, width – 38 cm, sleeeve – 49 cm
IMPORTANT: Measure the fullest part of your chest. Divide your measurement by 2 and chain a multiple of 6. You’ll need 2 details – a front and a back patrts. If your bust is bigger than D, you should make the front part a little bigger than the back part on 3-4 cm.
Stitches Used: ch-chain, sl st-slip stitch, sc- single crochet, dc-double crochet, picot, popcorn stitch, triple picot
PATTERN:
MAIN PATEERN:
Row 1: ch-60, dc in the 6th ch from the hook, * ch-1, skip next ch, dc in next ch **, rep from * to ** to the end of the row (30 dc)
Row 2: ch-3, turn, 3 dc in the 1st dc, * skip next 2 dc, 3 dc in next dc, ch-1, 3 dc in same place ** rep from * to ** to the end of the row, skip next 2 dc, skip next ch, 4 dc in next ch
Row 3: ch-3, turn, 3 dc in the 1st dc, * 3 dc in next ch-1 space, ch-1, 3 dc in same space **, rep from * to ** to the end of the row, 4 dc in the top of ch-3
Row 4: ch-3, turn, popcorn st (2 dc) in the 1st dc, ch-5, * popcorn st (5 dc) in next ch-1 space, ch-5 **, rep from * to ** to the end of the row, popcorn st (3 dc) in the top of ch-3
Row 5: ch-4, turn, skip next st, dc in next st, * ch-1, skip next st, dc in next st **, rep from * to ** to the end of the row
Row 6: ch-1, turn, sc in next 3 sts, picot, * sc in next 6 sts, picot **, rep from * to ** to the end of the row, sc in the last 4 sts
Row 7: ch-1, turn, sc in the 1st sc, * ch-5, skip picot and next 2 sc, sc in next sc **, rep from * to ** to the end of the row
Row 8: ch-1, turn, sc in the 1st sc, * 3 sc in next ch-5 space, triple picot, 3 sc in same space, sc in next sc **, rep from * to ** to the end of the row
Row 9: ch-5, turn, sc in the top of the triple picot * ch-5, sc in the top of the triple picot **, rep from * to ** to the end of the row, ch-2, dc in the last sc
Row 10: ch-1, turn, sc in the 1st dc, 2 sc in next ch-2 space, sc in next sc, * 5 sc in next ch-5 space, sc in next sc **, rep from * to ** to the end of the row, 3 sc in the last ch-5 space
Row 11: ch-4, turn, skip next sc, dc in next sc, * ch-1, skip next sc, dc in next sc **, rep from * to ** to the end of the row
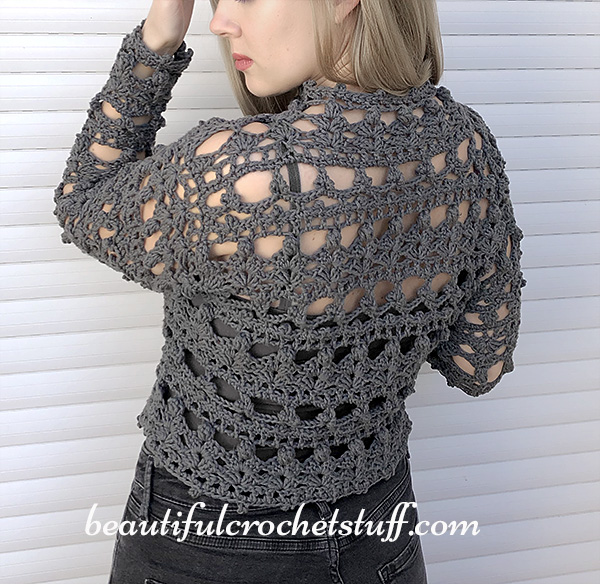
Rep Rounds 2-11 2 times or as many times as you need. Finish with the Row 2. Repeat previous steps for the back part. Connect the back part to the front part while you are crocheting the 2nd row of the back part this way (the shoulders seam):
Fold two parts with wrong-sides facing each other
ch-3, join by sl st to top of ch-3 of the front part, 3 dc in the 1st dc of the back part,
* skip next 2 dc of the back part, 3 dc in next dc of the back part, sl st to the next ch-1 space of the front part, 3 dc in the same dc of the back part **, rep from * to ** once,
* skip next 2 dc of the back part, 3 dc in next dc, ch-1, 3 dc in same space **, rep from * to ** four times,
* skip next 2 dc of the back part, 3 dc in next dc of the back part, sl st to the next ch-1 space of the front part, 3 dc in the same dc of the back part **, rep from * to ** once, crochet 4 dc in the last dc of the back part and join with sl st to the last dc of the front part
Fold two parts with right-sides facing each other and join the sides seams by sl sts. Don’t forget leaving the places for arm-holes. I leaved 21 cm from each side.
SLEEVES
Make 60 sc or a multiple of 6 around the armhole and repeat Rows 11th, then from the 2nd to the 8th. From the 9th row start decreasing this way:
Row 9: ch-5, turn, sc in the top of the triple picot * ch-3, sc in the top of the triple picot **, rep from * to ** to the end of the row, ch-2, dc in the last sc
Row 10: ch-1, turn, sc in the 1st dc, 2 sc in next ch-2 space, sc in next sc, * 3 sc in next ch-3 space, sc in next sc **, rep from * to ** to the end of the row, 3 sc in the last ch-5 space
Row 11: ch-4, turn, skip next sc, dc in next sc, * ch-1, skip next sc, dc in next sc **, rep from * to ** to the end of the row. You’ll get 16 dc
Then repeat Rows 2-12 as many times as you need. I repeated those rows one more time with the decrease after the 8th row but you can repeat them without the decrease, it depends on your arm’s width.
Finish the sleeve with Row 6 (row of picots). Fold the sleeve in twice with right-sides facing each other and make the side seam by sl sts.
NECK
Repeat Row 3-6
Repeat Row 6 for the bottom part of the top