
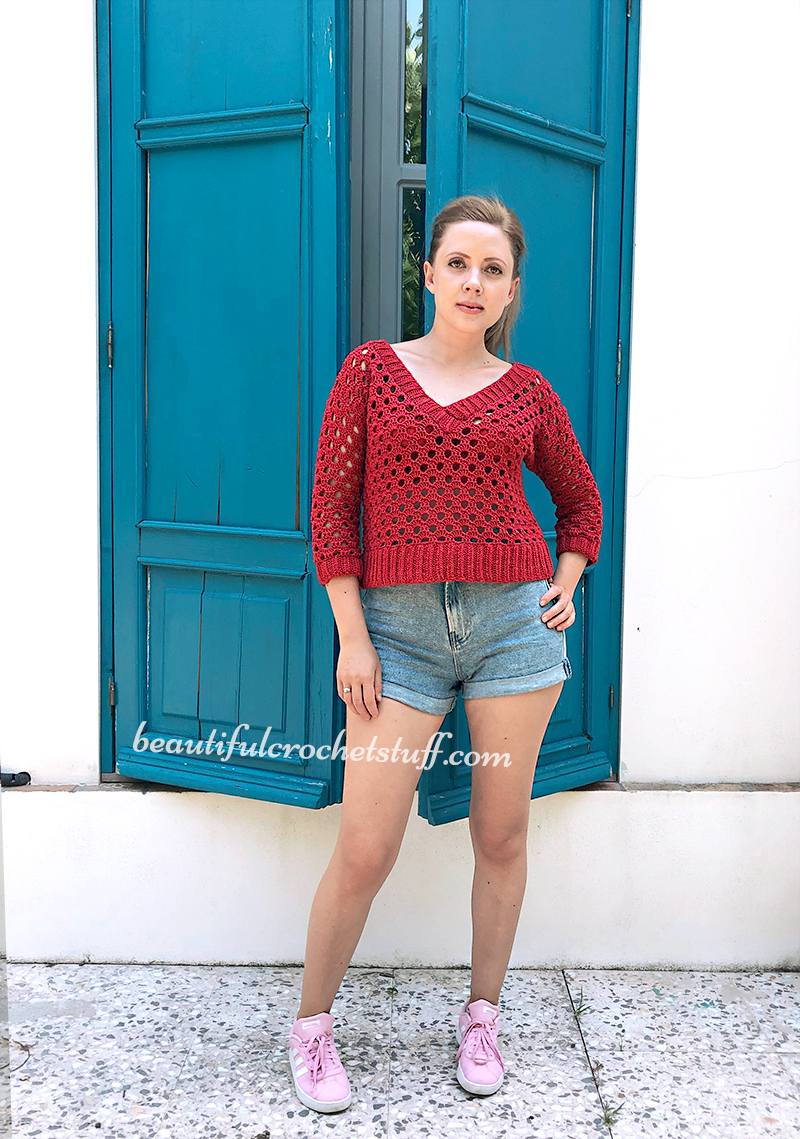
Hi girls! Today I want to share with you my thoughts about Paintbox yarn. Finally, I got my package from LoveCrafts.com!
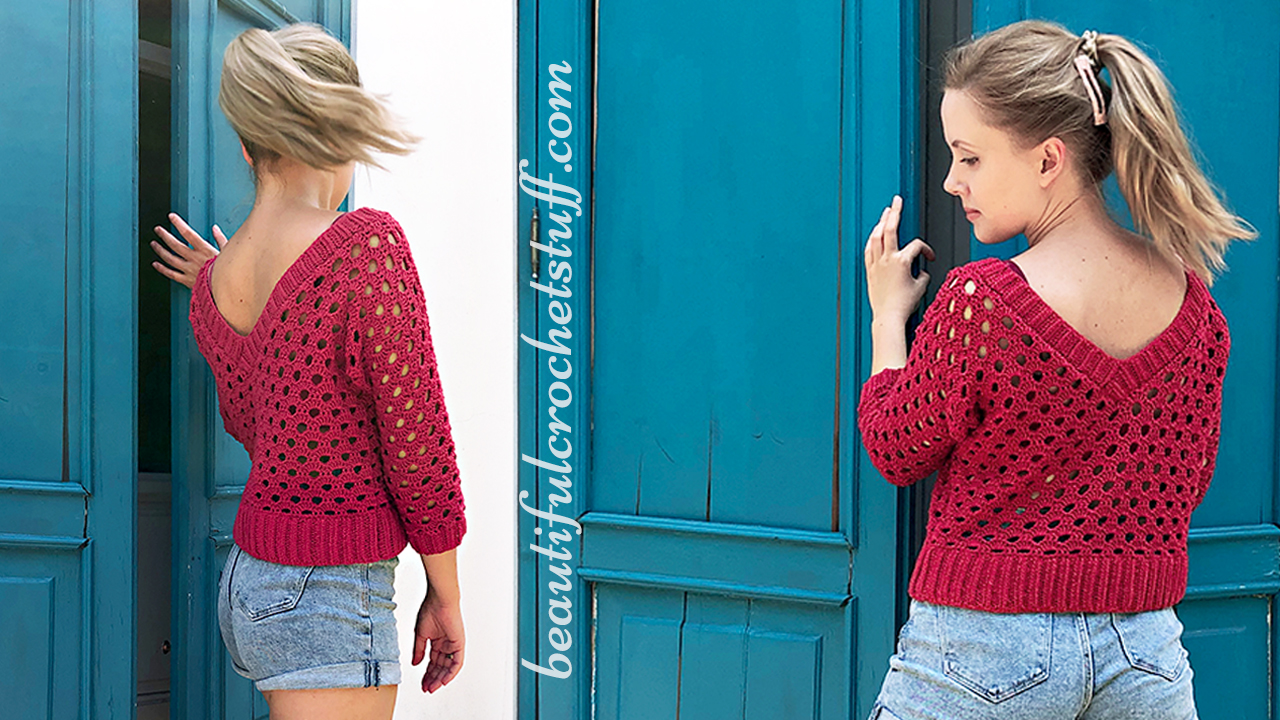
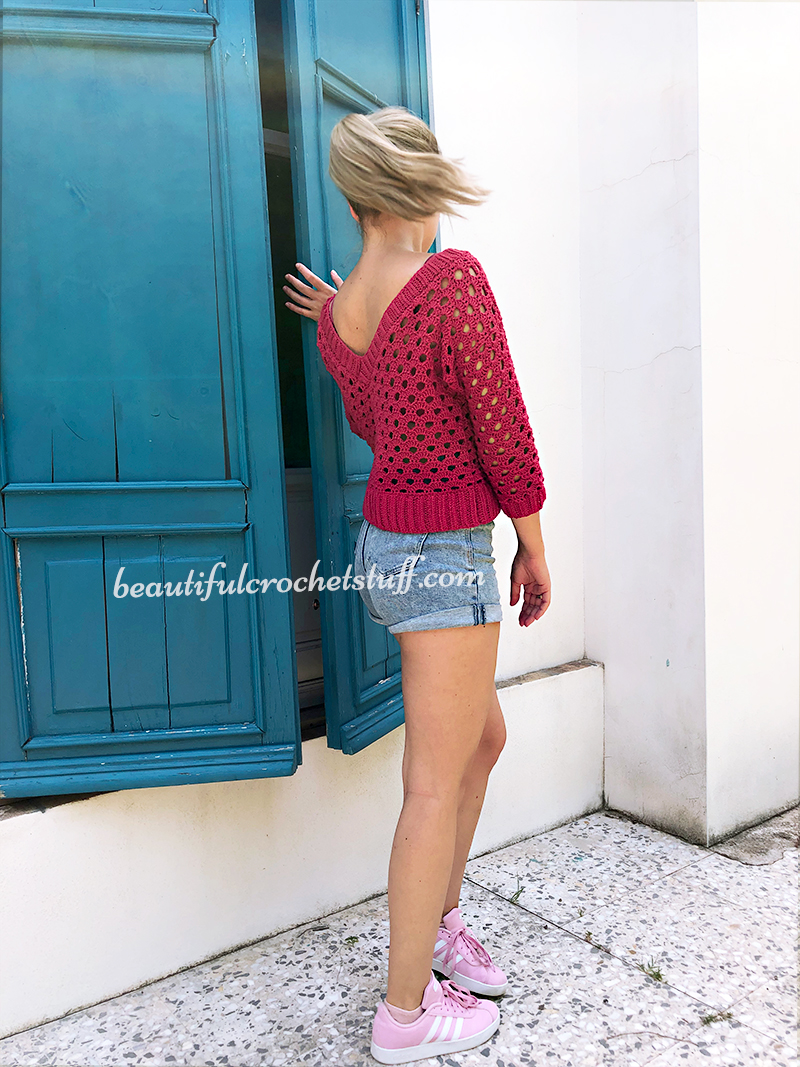
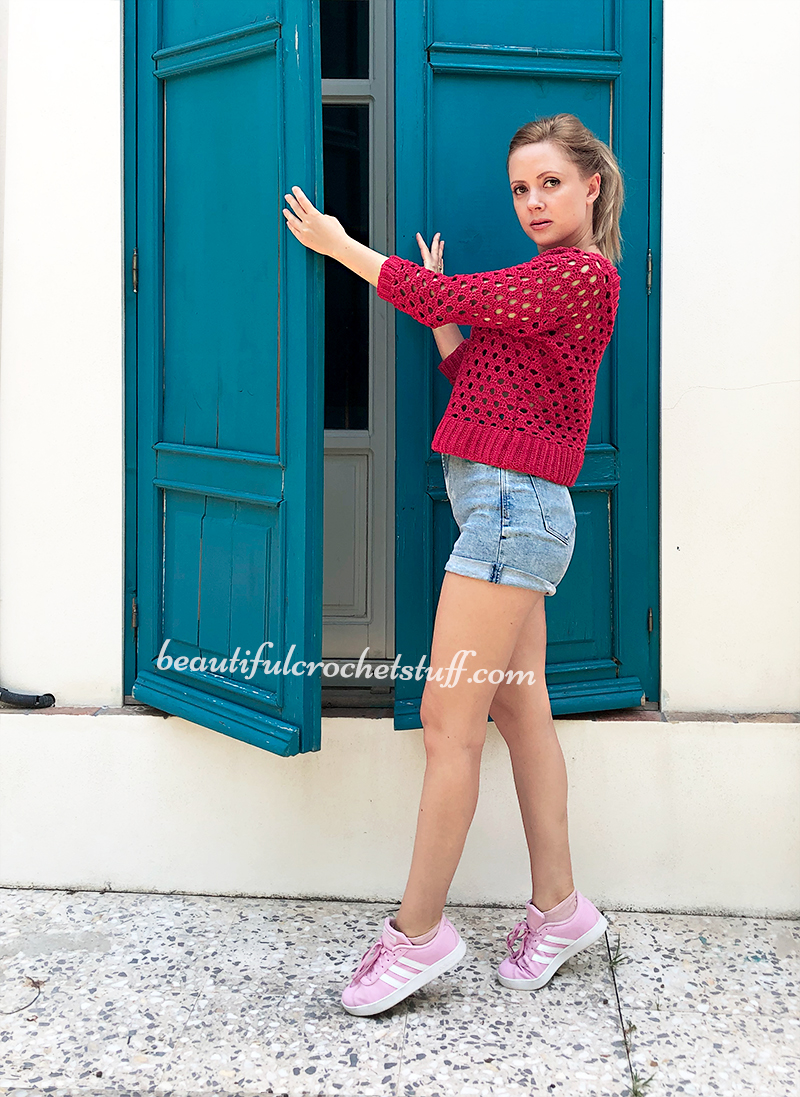
I became a happy owner of 8 skeins of yarn for my V-neck sweater. I chose “Red wine” color. It’s 100% DK cotton, natural, soft, and well-twisted yarn. You can crochet any project in a short time with this type of yarn.
But most of all, I liked the color of the yarn. I’d call it Royal Red. By the way, the color of the yarn on the site matches the real color. So I got exactly what I wanted. You will definitely not be mistaken when choosing a color for your future project.
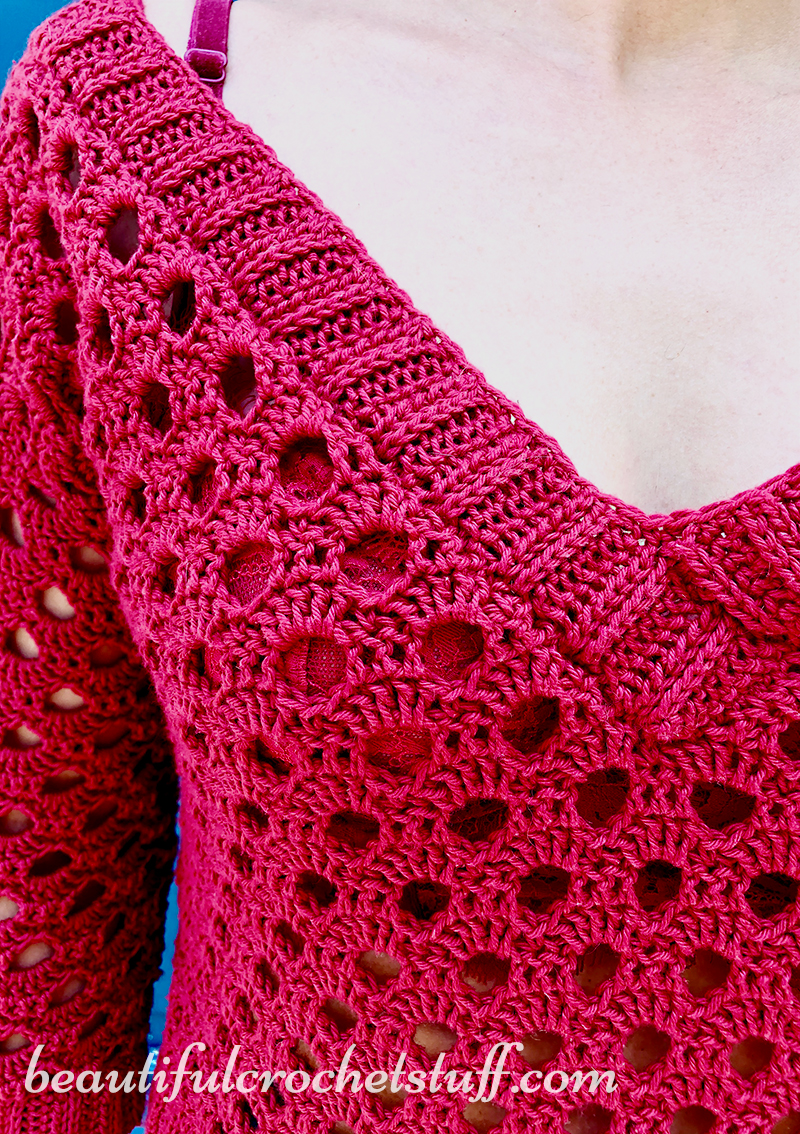
As you can see the thread creates a clear texture and looks perfect with different patterns.
I’m sure I will order from them again!
Everything was good, including the packing of the yarn, the shipping (less than a week), customer service, and the design of the label (minimalistic design looks good in my video).
YOU CAN BUY YARN HERE –> CLICK
MATERIALS:
Yarn 8 skeins:
Weight: DK (11 wpi)
Yardage: 137 yards(125 meters)
Unit weight: 50 grams (1.76 ounces)
Hook size: 4.0 mm (G)
Fibers: 100% Cotton
Texture: plied
Stitches Used: ch-chain, sl st-slip stitch, sc-single crochet, dc-double crochet, tc-triple crochet, yo sl st-yarn over slip stitch, pf lo-post front loop only
Gauge: 12 sts x 12 rows = 5 cm or 2 inches (rib pattern), 10 sts x 5 rows = 5 cm or 2 inches (main pattern)
Size: S-M, width – 44 cm or 17 1/2 in, length – 43 cm or 17 in, bottom rib – 7,5 cm or 3 in, sleeve and
neck rib – 4 cm or 1 1/2 in
Start crocheting the sweater from the bottom up.
SIZES: the length of the bottom rib = my shoulders width, but if you have a half bust measurement bigger then your shoulders width, make the front part of the sweater bigger then the back part of the sweater this way: 2 “half bust measurement – shoulders width = front part measurement”. Back part measurement = your shoulders width. The holes for the sleeves depends on you, but you must crochet the first sc row around the holes a multiple of 5+1.
PATTERN:
Rib (2 details):
Row 1: ch-16, yo sl st in the 2nd ch from the hook, yo sl st in each st to the end of the row
Row 2-3: ch-1, turn, yo sl st in the back loop only, yo sl st in each back loop only to the end of the row
I don’t know the name of the place you should work next. I will call it a post front loop only. If you know the name of it please let me know in comments.
Row 4-5: ch-1, turn, yo sl st in each post front loop only to the end of the row
Repeat Row 2-5 until you reach the desired length. I crocheted 54 rows.
NOTE: every time when you start a new rib you must crochet 3 rows of the stitch in the BACK LOOP ONLY at the beginning, then alternate 2 rows of stitches in the POST FRONT LOOP ONLY and 2 rows of stitches in the BACK LOOP ONLY.
MAIN PATTERN:
Row 1: crochet a row of sc across the rib. The number of stitches must be a multiple of 5+1. (I crocheted 81 sts)
Row 2: ch-3, turn, dc in next sc, ch-2, * skip next 2 sc, dc in next 3 sc, ch-2 **, rep from * to ** to the last 2 sts, dc in the last 2 sc
Row 3: ch-1, turn, sc in the same space, * 5 dc in next ch-2 space, sc in the 2nd dc **, rep from * to ** to the end of the row (16 shells)
Row 4: ch-4, turn, skip next dc, dc in next 3 dc, * ch-2, skip next dc sc dc, dc in next 3 dc **, rep from * to ** to the end of the row, ch-1 tc in the last sc
Row 5: ch-3, turn, 2 dc in the same space, sc in the 2nd dc, * 5 dc in next ch-2 space, sc in the 2nd dc **, rep from * to ** to the end of the row, 3 dc in the top of ch-4
Row 6: ch-3, turn, dc in next dc, * ch-2, skip next dc sc dc, dc in next 3 dc **, rep from * to ** to the end of the row, ch-2, dc in last 2 stitches
Rep Row 3-6 until as many times as you need. I crocheted 19 rows of the pattern (include a sc row). You can crochet more rows to make the sweater longer, then start decreasing from the 4th row. Decrease from the inside.
V-NECK:
Start decreasing from the twentieth row this way (LEFT SIDE):
Row 20 (Row 4): ch-4, turn, skip next dc, dc in next 3 dc, * ch-2, skip next dc sc dc, dc in next 3 dc **, rep from * to ** to the 8th shell (7 ch-2 spaces)
Row 21: ch-1, turn, sc in the second dc, * 5 dc in next ch-2 space, sc in the 2nd dc **, rep from * to ** to the end of the row, 3 dc in the top of ch-4
Row 22: ch-3, turn, dc in next dc, * ch-2, skip next dc sc dc, dc in next 3 dc **, rep from * to ** to the end of the row, ch-2, dc in last 2 stitches
Row 23: ch-1, turn, sc in next dc, * 5 dc in next ch-2 space, sc in the 2nd dc **, rep from * to ** to the end of the row
Rep Row 20-23 until you’ll reach 3 ch-2 spaces
Come back to the twentieth row and start decreasing from the inside (RIGHT SIDE):
Row 20 (Row 4): join the tread to the second dc, ch-3, dc in next 2 dc, * ch-2, skip next dc sc dc, dc in next 3 dc **, rep from * to ** to the end of the row, ch-1 tc in the last sc
Row 21: ch-3, turn, 2 dc in the same space, sc in the 2nd dc, * 5 dc in next ch-2 space, sc in the 2nd dc **, rep from * to ** to the end of the row (7 shells)
Row 22: ch-1, turn, sl st in next 2 dc, ch-3, dc in next 2 dc, * ch-2, skip next dc sc dc, dc in next 3 dc **, rep from * to ** to the end of the row, ch-2, dc in last 2 stitches
Row 23: ch-1, turn, sc in same space dc, * 5 dc in next ch-2 space, sc in the 2nd dc **, rep from * to ** to the end of the row
Rep Row 22-23 until you’ll reach 3 ch-2 spaces
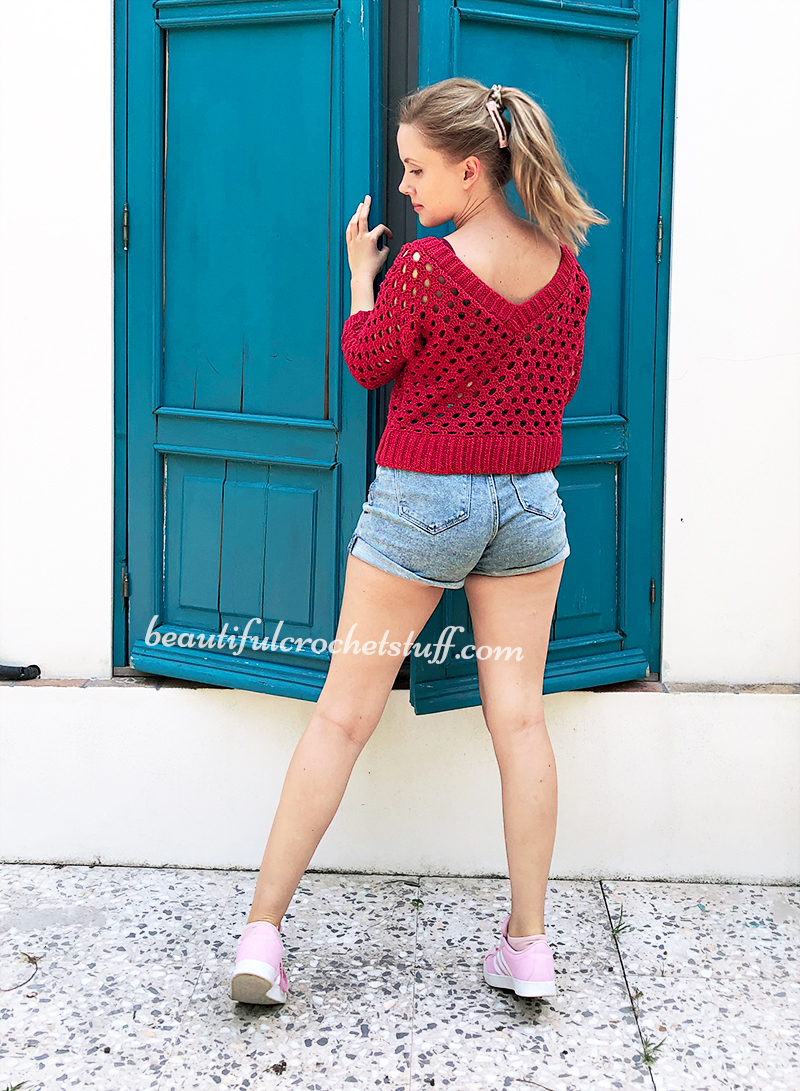
Crochet 2 details. Put these two details of the sweater right side together and join them by sl st. Shoulders part and sides. Leave 19 cm or 7 1/2 in holes for sleeves.
SLEEVES
NOTE: we will crochet the sleeves in the rows and decrease them from the two sides
Row 1: crochet a sc row. The number of stitches must be multiple of 5+1. (66 sc)
Row 2: ch-3, turn, dc in next sc, ch-2, * skip next 2 sc, dc in next 3 sc, ch-2 **, rep from * to ** to the last 2 sts, dc in the last 2 sc
Row 3: ch-1, turn, sc in the same space, * 5 dc in next ch-2 space, sc in the 2nd dc **, rep from * to ** to the end of the row (13 shells)
Row 4: ch-1, turn, sl st in next 2 dc, ch-3, dc in next 2 dc, * ch-2, skip next dc sc dc, dc in next 3 dc **, rep from * to * to the end of the row
Row 5: ch-1, turn, sc in the 2nd dc, * 5 dc in next ch-2 space, sc in the 2nd dc **, rep from * to ** to the end of the row
Rep Row 4-5 until you’ll reach 9 shells, then rep the main pattern from the 4th Row as many times as you need. I crocheted 28 rows (include a sc row)
Join two sides of the sleeve with sl st from the wrong side of the sweater.
CUFFS, NECK
ch-9, rep the rib pattern
Cuffs – crochet 53 rows of the pattern
Neck – the 1st detail – 115 rows, the 2nd detail – 99 rows
Join details to the sweater with sl st. Crochet a row of sc around the cuffs, the neck, and the bottom.


This is awesome! Perfect for fall ?
Thank you so much!
I have been Crocheting for 53 years and have never heard of the following:
yo sl st = yarn over slip stitch,
YO is a term meaning to wrap the Yarn Over the Hook.
sl-st [or slp] = Slip Stitch.
There is no need to say YO with the term ‘sl-st’ as one automatically puts the yarn over the hook to make a slp-st.
As for:
pf lo = post front loop only
The POST is that part of the stitch which is “vertical”. It is the main part of the stitch. The other parts of the stitches have specific names also.
At the Top of the stitch are the “chain-loops” These loops form the little “v”‘s which run along the top of the stitches. Then there are the “legs” of the stitches. These are the strands found at the bottom of the stitch. The strands which connect the stitches of this row you are now making to the stitch of the previous row.
All you need to say/write is:
…”In blp only”… = (in back Loop only)
There is no need to say the part regarding the “post” of the stitch. That term, “Post”, is used only when you want a person to work “AROUND” that part of the stitch. This technique is used for making “Post Stitches” . The Front Post and Back Post Stitches are used to form the designs used /made when making things like “The Waffle Stitch”, the “Basket Weave Stitch” and all the “Crochet Cables” Designs.
So simply writo “slp-st”, and “blp” only. [I have also seen it written “blo”, but, being used rarely, this abbreviation is generally recognized by those who are “mid-intermediates ” or higher in ability.
I hope I have written this clearly, and hope it helps. If not, I recommend “The Yarn Craft Council of America”. They have “Standardized” all the yarn types & weights, stitch names, etc. [They also provide training so one can become a certified. teacher of Crocheting or Knitting or…]
Hi Tracy!
Thank you for your detailed answer! I’m happy that you share your experience with us :) I knew a lot! But the pattern is done and I will follow your advice in the future.
As for:
pf lo = post front loop only, I know of the existence of front post and back post stitches. I use them often in my patterns. I specifically named it a “post front loop only” not a “back/front post stitch” in order not to confuse them. I hope it is worked and my pattern is clear for understanding :)
I think the way you worded it was perfect. I also questioned what you meant, until I started working on the pattern myself. Since your slip stitching through both the first yarn over and initial loop on hook, which then creates a V-shape in a very Unique’s place and fashion; the post front loop only is actually a VERY accurate description of where you’re to work the next stitches from. Thank you for such a beautiful pattern! Your work continues to amaze me! Never stop crocheting girl!
Thank you very much for your kind words! Nice to hear it :)
Thank you for sharing.
Hello, I love your design and the pattern. The sweater came out so beautifully . Is it possible to make it in a size XL ? Thank you :)
Yes, sure! Crochet an example, measure your chest (the fullest part), divide the measurement by 2, and count how many examples contain your half sweater part. You should add more rapports on the sides. Hope it helps :)
I’m a beginner crocheted and got to the part where you day “crochet 2 details” and I’ve watched the video as well but still can’t figure out what that means. Please help! I love this sweater so far and hate being stuck so far along :(
You should crochet 2 details of ribs (according to your measurements) then rep the main pattern
I am only an intermediate crocheter, but I like this pattern and find it very do-able so far. I wanted to give a few things that were unclear (to me) or perhaps written differently, so others don’t have the difficulties I did. First, I think the stitch multiple has to be 10+1, not 5+1, because if you end up with a multiple of 5 (like I did, just one set of 5 less than her sample), then you will have an uneven number of chain-2 spaces/holes, which won’t divide evenly in half for the V in the front (my problem that I just realized but will finish this side anyway). Also, for the V-neck decrease on the RIGHT SIDE, I would repeat rows 20-23, not 22-23 to make it work out right. Of course, for row 20, you won’t be joining the thread each time, just the first time. Otherwise, just start with ch-3. As to a question posted earlier, the phrase “crochet 2 details” means make two of the pieces, exactly alike (the whole front and the other will be the back). Then you will join the pieces at the shoulder seams and side seams with a slip stitch. I haven’t done the sleeves or the neck yet, so I’ll see if there are any other clarifications. I had thought about next time, knitting the ribbing and then continuing with crochet after that (I think it’s easier to keep track of which stitch I’m doing for ribbing in knit than crochet).
Sorry, I just made it work with 22-23 only repeated. So disregard that comment, but the other comments on the stitch gauge and the meaning of “2 details” still apply.
Thank you so much for your comments! They are very helpful!
The way I made the repeats work is that at the end of row 22, one time I would do as written (ch-2 then dc in last 2 stitches), but the next time I came to the repeat of that row, I would ch-1 and tc in the last sc (like in row 20.) To do 2 dc at the end of each repeated row 22 doesn’t work out for me, it needs to alternate from 1dc to 2 dc, just like the main pattern does before the decreases.
Beautiful! I will try and make it. I am new to crocheting, but really want the sweater like this.
A question-after completion the row 2 of the rib, do you have 15 or 16 stitches? Thank you.